5 PowerPoint Cropping Tricks You Didn’t Know Were Possible
1. Distort and Fill
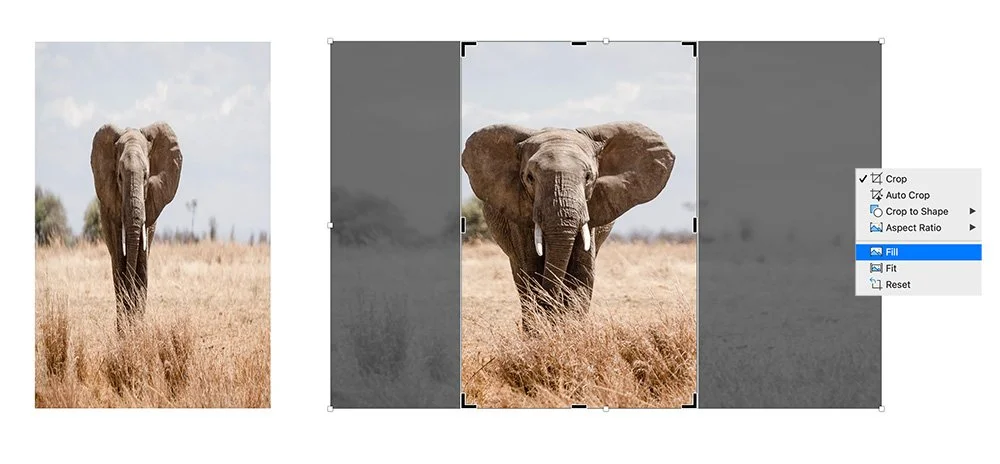
Don’t try manually cropping an image to the perfect dimensions. Just resize the shape into the desired area and ignore the distortion. Once the image fills the exact space on your slide you want, go to Crop: Fill… to magically undistort the image within the crop!
2. Custom Shape Crop
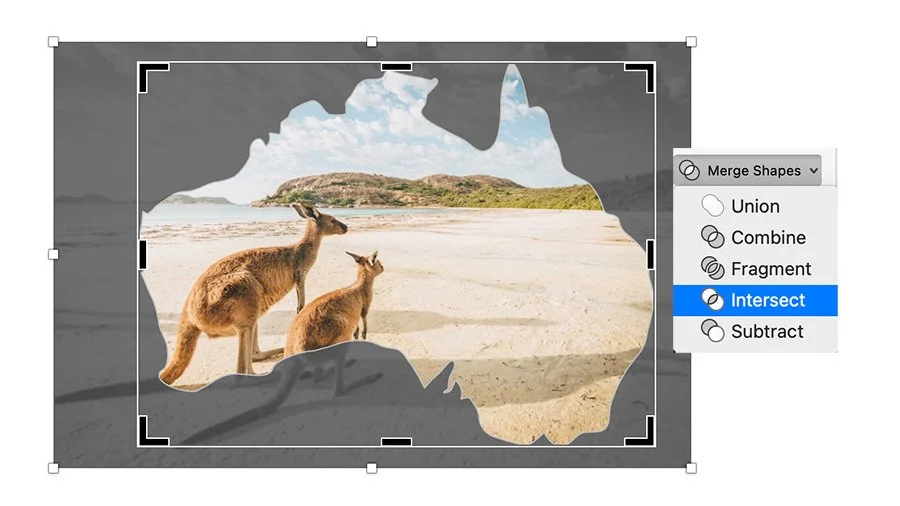
If you want to crop to a custom shape that is not one of PowerPoint’s default options, bring in a vector SVG of the shape, convert it to shapes (or ungroup it), then place the shape over your image: Select the image, shift-click the shape, then go to Merge Shapes: Intersect… to create your custom crop.
3. Perfect Circle Cropping
PowerPoint does not have a circle tool, but it does have an oval tool. So if you crop an image to the oval tool, unless it’s square, you’re not going to get a perfect circle. But let PowerPoint do the work by going to Crop: Aspect Ratio: 1:1. Also works with any other cropped shape!

4. Auto Crop (Mac only!)
Under the Crop options, select Auto to have AI decide how best to crop to the subject of your photo. Not yet available on the PC…

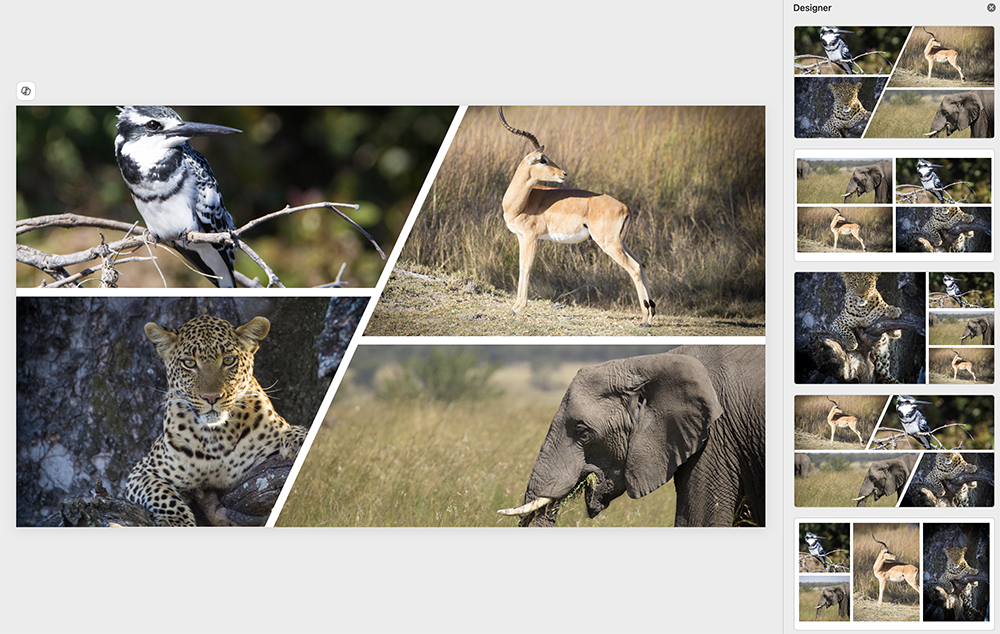
5. Instant Collage with Designer
If you want an instant and interestingly cropped collage of images, just place them all on a slide and head to Designer (now part of Copilot for most users) for a bunch of design suggestions. Note that this currently works best with a default Office theme, so if you’re working with a custom template, you might want to copy your images to a new blank file, apply Designer, then copy the slide or cropped images back into your template.